Thursday, March 20, 2014

Garden visit to Coolart wetlands and homestead Mornington Peninsula Australia

 Coolart wetlands & homestead in the summer


Early this year I was lucky enough to take holidays at a small beach side town called Somers on the Mornington Peninsula. I've visited Somers several times in the past and on the drive into town always saw a sign labelled 'Coolart wetlands'. I used to think it was purely a nature reserve of sorts so I was pleasantly surprised to find an attractive and large garden there when I visited this year.

Coolart homestead and wetlands started out as a pastoral lease for the Meyrick brothers in 1839 (I wonder if that is the reason that a nearby town is called Merricks?). In 1895 it was purchased by Frederick  Grimwade for use as both farmland and a country retreat. In 1937 it was purchased by Tom Luxton and it was he who persuaded the state government to declare the estate a wildlife sanctuary. It was also at this time the garden was developed and many of the plantings still survive to this day. The state government took over management of the estate in 1996.

The gardens surrounding the impressively large manor contain several well established exotic trees. There are also several herbaceous borders, a rose garden and lots of hedging. The wetlands area is home to lots of wetland birds and there is also a woodland area that is home to the local Koalas. The interior of the house when I visited was very rundown. I could only get into a few rooms as all of the upstairs section was closed due to plaster falling from the ceiling and walls. There is also a herb garden and orchard on the estate. Entry is free and If you are in the area I would definitely recommend a visit. 


The large manor house in all its glory.


Orchard near the entrance


Fast growing wisteria crawling all over an archway.


View of the front lawn


One of the herbaceous beds. 


Good old dahlias in flower. 


A nice little pond area with bridge. An original small building in the background.


 The herb garden looked a bit dry. Then again it was summer so it was to be expected.


A European beech tree.


A golden ash tree. One of many exotics planted by the Luxtons.


Close up of lovely gingko biloba leaves.


The gingko in its entirety. Quite a large specimen.


Some sort of cedar tree.


Canna indica


Muehlenbeckia hedging. So popular in Melbourne.


Classic box hedging.


It was a really hot day when I was there. Shady areas like this were a godsend.


Thursday, March 6, 2014

How to preserve fresh beans by freezing them

HOW TO PRESERVE YOUR BEANS

I went out into my garden the other day to inspect my edible plants to find that I had a bumper crop of beans. Presently my beans are in full production mode and as such I have more than I can eat so I decided to freeze some. I will admit that I haven't really done much preserving of produce in the past so I thought that freezing my beans would be an easy start into the world of produce preservation. Its really easy to do and many of you probably already know this but some may not so here it goes.

Why should you freeze beans using this method?

Freezing beans using this method will preserve the colour and nutrients inside the beans. If you just throw them in the freezer without blanching them they will be dull and less nutritious when you re-heat them.

You will need

  • A colander
  • Freshly picked beans (the sooner you freeze them the better)
  • Chopping board
  • Knife 
  • Boiling pot
  • Cooling bowl (any large bowl)
  • Zip lock bags
  • Water
  • A freezer

Method


1. Pick your beans just before you plan to freeze them. If you leave them in the fridge overnight and then freeze them they won't be as nutritious or tasty


2. Boil a large pot of water. You will need enough to cover the beans.

3. Cut off the tops of the beans (the part with the stem attached) and the tails if desired. Then cut them into bite sized pieces.


4. Fill the cooling bowl with cold water and plenty of ice.

5. Place the beans in the boiling water then remove them after 2 minutes. Drain them in a colander.


6. Directly after draining the beans place them into the cold water until cooled.


7. Once cooled drain them in the colander.

8. Pack them into your zip lock bags, leaving a little room at the top, then place them in the freezer.


Re-heating the frozen beans

The trick to reheating them is not to boil or steam them for too long. If you do so the beans can become mushy and a bit bland. I usually place the frozen beans in boiling water then just bring the water back to the boil for only 30 seconds. If you are unsure just taste one of the beans and remove them when you are happy.


Sunday, March 2, 2014

Visit to the open garden Cruden Farm. Dame Elisabeth Murdoch's place.


CRUDEN FARM VISIT

Late last year I took the 2 hour drive from Macedon to Cranbourne to see Cruden Farm. Cruden Farm is the property of the late Dame Elisabeth Murdoch (mother of Rupert Murdoch). The property comprises of 135 acres of land which is massive considering its location. The original garden was the 1930 creation of the famous Edna Walling who was responsible for many garden designs back in those times. The garden now, however, is almost solely from the vision of Elisabeth Murdoch. Its main features are a walled garden, native garden, lake area, a piccking garden and a long driveway lined with Corymbia citriodora (lemon scented gum) trees. When I was there the garden was packed with visitors as I believe is was the first opening since Elisabeth Murdoch passed away.


The picture below is of the first garden bed I saw upon entering the garden. The conspiracy theorists out there will probably love the fact there is an owl on top of that frame.


Alstroemerias I believe.


I view of the house which considering Elisabeth Murdochs wealth appeared almost low key.


Entrance to the walled garden. You think they would have packed up that hose before the opening. 


One of several statues inside the walled garden. It looks like a Bruno Torf creation but I don't know for sure.


Some fine topiary at the entrance of the picking garden


Inside the picking garden. This picture gives you an idea as to how many people were there that day.


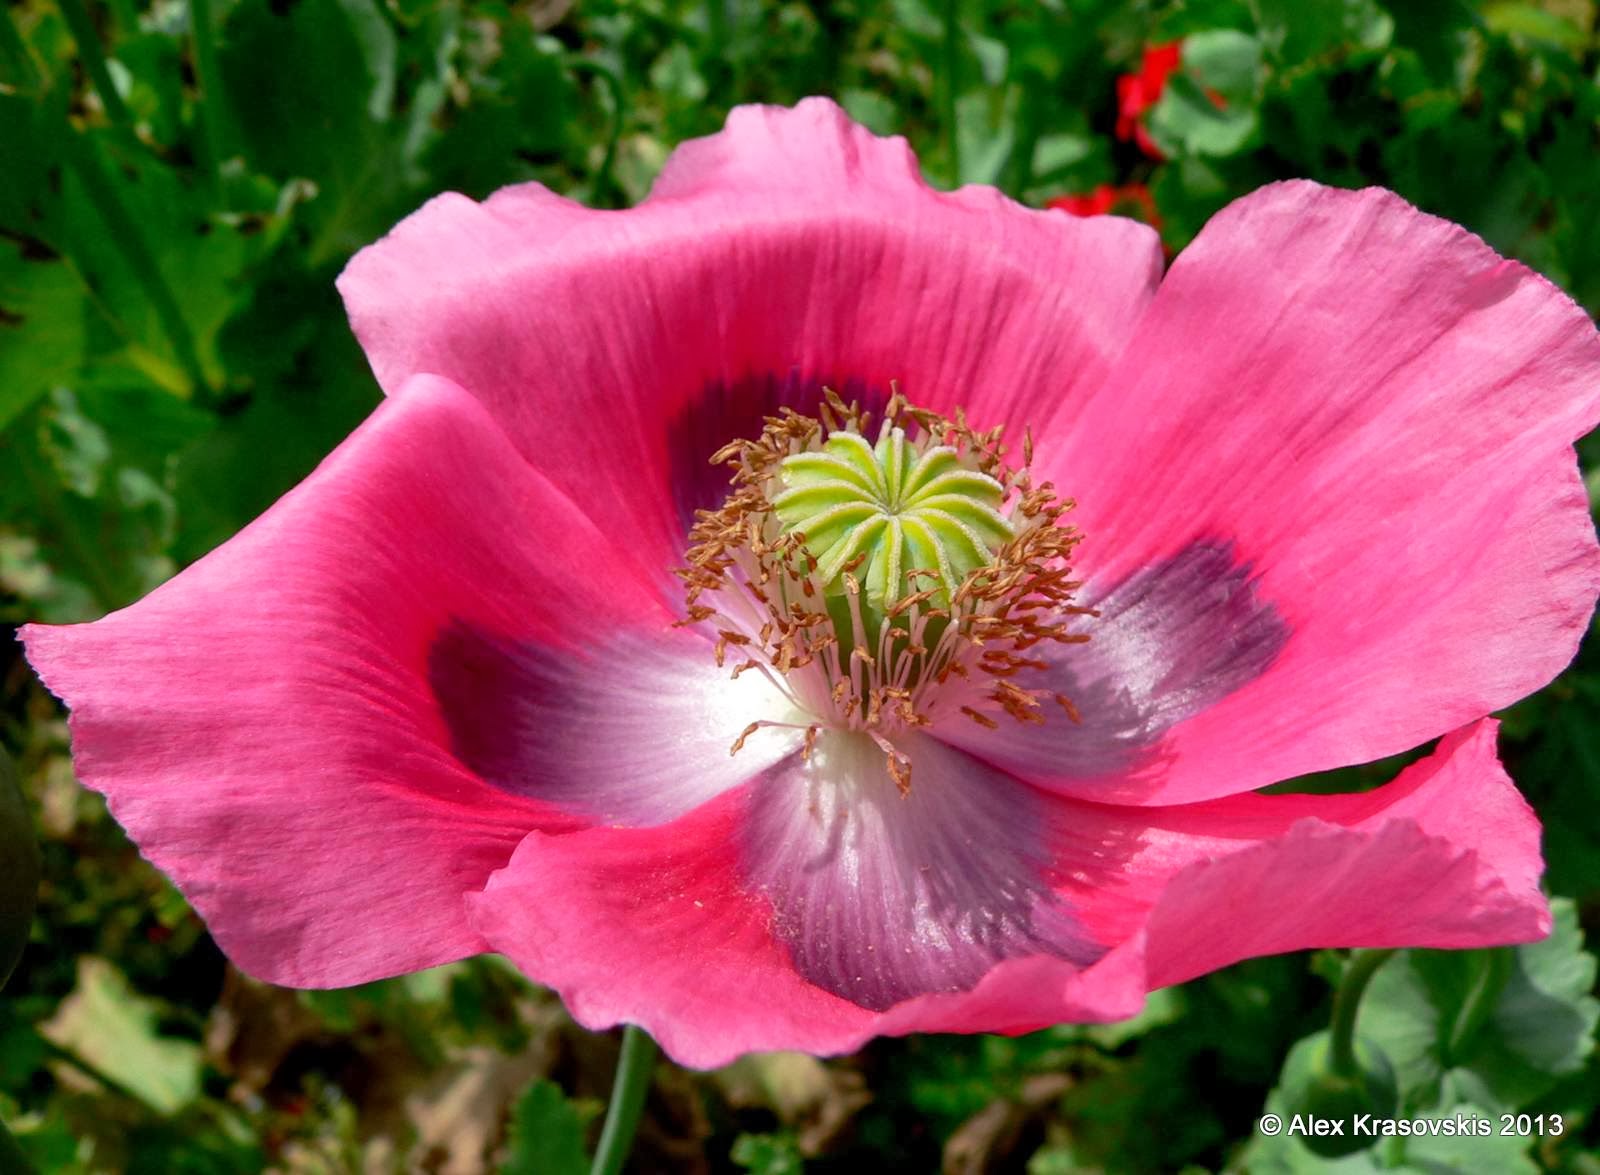
A poppy in all its glory.


These 2 lemon trees situated to the side of the picking garden had more fruit on them than any other lemon tree I have seen.


English box hedged to create lines in the picking garden. It isn't often you see it pruned with that tapering shape.


A frame of sweet peas.


It is a little hard to make out from the picture below but it is actually a climbing rose trained on a frame to make it look like a small tree.


Lakes and willow trees.


Hydrangeas in pristine condition considering this was in the middle of a heat wave.


More of the lake areas.


The driveway lined with lemon scented gums. 


Dancing Brolga statue at the entrance to the walled garden.


Monday, February 24, 2014

Propagating strawberry plants from runners is easy

Propagating strawberries from runners


What are runners?

I looked at one of my strawberry pots last week and saw that it had several runners cascading over its edges. These 'runners' are one method that the strawberry plant uses to reproduce. Towards the end of the season the plant will start producing long stems that shoot out away from the main plant body. At the tip of these stems (or upon several points of the stem depending on how long they have been growing) you will see some green leaves or perhaps even some green leaves and a small root system beneath them. The technical term for the longs stem the plant produces is 'stolon' and the technical term for the leafy growth is 'plantlet'. The plantlets are infact a small version of the mother plant and you can use these to propagate several plants from the one mother or host plant.


Those long stems that you see shooting from the main plants are what are commonly known as strawberry runners.


Why propagate strawberries from runners?

After 3 years a strawberry plant will start to lose its vigor. It will fruit less and basically become weaker. Your options include;

  • Replacing the plants with newly purchased ones
  • Growing new plants from seed
  • Propagating new plants from crown division
  • Propagating the runners of the plant
Growing the plantlets on the runners into new plants is by far the easiest and safest option. Growing from seed is a little more difficult than most other edibles and propagating the crown by division can compromise the mother plant if not done correctly. The plants should actually naturally propagate by runners but if you give them a little help they can be even more successful. In the method described below I grow on the plantlets into small pots but you could actually grow them on in the ground next to the mother plant if you wish. Growing the plantlets in pots however gives you the option of planting out the new strawberry plants anywhere you wish. If you take the effort to help the runners then you possibly may never have to buy new strawberries again.

Runner propagation method

Propagating the runners is quick and easy to do. The steps are as follows;

1. Identify the planlet on the runner

Look for the leafy growths (plantlets) on the runners. You may have one plantlet on the tip of the runner or several along the one runner. If you have several generally the best one to propagate is the one closest to the mother plant as it probably has a root system.


A plantlet with no root system


A plantlet with a small root system


2. Create some pegging material to secure the plantlet

You could use any type of pegging method but I choose to use sticks that I break in the middle to create a pegging device. Its easy and doesn't cost anything.


A quick, easy, cheap and environmetally friendly pegging system (aka a bent stick).


3. Peg the plantlet into the potting mix

Make sure to peg it down roots down and leaves up. Even if there are no roots then they should develop if you peg the plantlet with the leaves up. The idea is for the roots or base of the plantlet to have constant contact with the potting mix until the plants roots develop a strong grip.


The picture below shows how the bent stick is used to peg down the plantlet. I deliberately haven't pushed it down all the way so you can clearly see how it is initially pushed into the pot.


Here is another plantlet that has been pegged down all the way (even though you can't see the peg believe me it is there holding down the plantlet). Make sure the base of the plantlet (roots or no roots) is touching the potting mix.


4. Cut the remainder of the runner

Snip off any remaining section that is growing past the plantlet that you choose to propagate. Make sure you cut off the correct end (ie not the end that attaches the plantlet to the mother plant). You do this to make the plant concentrate its energy on the plantlet that you have pegged down and not the remaining ones.


Note I am snipping of the stem on the side that is not attached back to the mother plant.


5. Water in the plantlet

Pretty self explanatory. Keep the potting mix in which the plantlets grow nice and moist until the roots take hold.

6. Detach the plantlet you are propagating from the mother plant

Once the plantlet has developed a strong enough root system you can separate it from the mother plant by snipping the runner that joins the two. You will know the root system is strong enough when you feel some resistance when you gently pull on the plantlet (with the pegging removed). If you can feel some sort of anchorage of the plantlet to the potting mix then the plantlet should be able to support itself from thereon.

7. Care for the new plants

If you care for them the new plantlets may even produce fruit assuming you have done this early in the season. Don't worry, if you propagate the runners late in the season the new plants should overwinter and produce fruit (and runners of their own) the next season.


Five little plantlets that should grow into strong new plants and produce fruit of their own next season. These new plants will be genetically identical clones of the mother plant.


Wednesday, February 12, 2014

The pros and cons of self seeding plants

Self seeding plants

This summer I've noticed several self seeding plants popping up in the garden at home and at work.

Self seeding weeds

In some cases self seeding plants are seen as a nuisance. The definition of a weed is 'a plant out of place'. This means anything that self seeds that you think of as being a nuisance can be classified as a weed. The trick to managing self seeding weeds it to remove them before they grow seed thereby eliminating their method of reproduction (easier said than done). Examples of notorious self seeding weeds are dandelions, plantains, clover and many others.

Desirable self seeding plants

If a self seeding plant that has miraculously grown all by itself is desirable then there is nothing more magical than watching a plant you love materializing all own its own. One of the best things about a desirable self seeder (apart from the fact that you have had to do nothing to grow it) is that they are sometimes superior to plants you have sown yourself.

Examples of desirable self seeding plants

One example of this is an echinacea plant that sowed itself at my work garden. The funny thing is that we were trying to grow this particular form of echinacea but it only grew very small. We couldn't keep the poor little thing alive and forgot all about it. The next season a massive Echinacea plant sprouted up less than one metre away from the original one on the opposite side of a path that separates the two locations. The self sown plant is huge (almost twice the size of the original). Another example is a massive sunflower that self seeded also at work. It has to be the biggest sunflower that I've ever seen. The plant grew without any help whatsoever and the single flower head was huge (see the picture below). The other very popular example of self seeding is that of self seeding edible plants (parsley, chives, chard, lettuce and many others).

Annual flowers are by nature great self seeders. Annuals (lasting only one year) obviously need to be good self seeders to keep propagating themselves. Annuals I have at home that have done this include amaranthus, pansies, sunflowers and hollyhocks. Hopefully next year I can add poppies and calendula to that list.


This is the seed head from the self seeded sunflower. Unfortunately it was in bloom when I was on leave from work so I couldn't get a picture of it in its full glory. I'll save all those seeds and plant them at home next spring.


Amaranthus that grew itself in my home garden. Note all the annuals in the background that I've purposely left to run to seed. They should add to next years warm season annual display.


Below is the humble pansy. These little troopers keep reproducing themselves year after year. Heaps of them sprouted in my annual bed of my Macedon home last spring.


Saturday, February 8, 2014

Rudbeckias are great perennial plants for late summer colour.

Rudbeckia

Early this year I had to do an assignment on plant selection for a proposed garden design. As part of that work I need to visit a nursery and photograph the plant tags for the specimens I chose for the design. The local nursery I visited shut down some months ago now but I have a plant growing and thriving in my home garden that was kindly given to me as a gift by the nursery owner.

The plant is a Rudbeckia and as it was propagated by the nurseryman himself it didn't come with a plant tag so I'm not exactly sure of the species. I'm 90% sure mine is Rudbeckia fulgida because it fits the description of having a slight serration in the leaf margin and also leaf hairs. Rudbeckias are amazing looking plants which come into bloom late summer after all my regular annual flowers are tailing off to seed. My one has large yellow daisy like flowers but they also come in other colours. The great thing about the one I have is that with very little care it has quickly grown into a massive plant (and I have read that they are so vigorous that they can become invasive in rich soils). When I first planted it the Rudbeckia was very small indeed. It came in a tube and had a single flower stem with one flower. Within  one season it is now roughly a metre tall with bunches of flowers. See the link below for a picture of this now massive plant when I first put in into the soil.

http://aggregata.blogspot.com.au/2013/05/clearing-slate-for-my-macedon-garden.html

Dividing Rudbeckias

As they are clumping perennial plants Rudbeckias can be propagated by division. I haven't done this myself but I have read that it is as easy as digging up the plant and splitting it with a sharp spade in spring then replanting the clumps in a desired location. I've propagated other clumping plants by division before and I have to say that it has to be one of the most successful propagation methods. Apparently you should divide Rudbeckias every three years.


The massive flower heads on my Rudbeckia.